2024. 10. 9. 20:41ㆍProject
이 프로젝트에서는 Node.js와 Express를 사용하여 한국거래소 API를 MongoDB에 연결하고, 저장된 데이터를 MongoDB Compass를 통해 시각화하는 방법을 살펴보고 Studio 3T로 쿼리 코드를 확인 해보겠습니다.
#1 MongoDB 서버 실행
MongoDB 설치가 완료되었다면, 명령 프롬프트를 열고 다음 명령어를 입력하여 MongoDB 서버를 실행하세요.
gomod
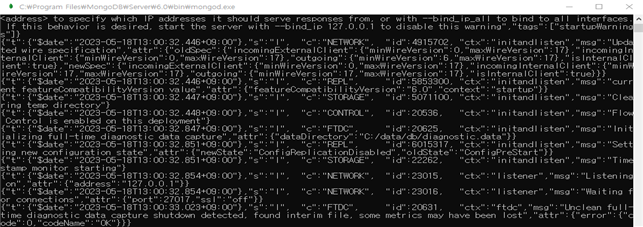
서버가 성공적으로 실행되면 다음과 같은 메시지를 확인할 수 있습니다
#2 MongoDB 서버와 웹서버를 연결
서버가 실행되면 한국거래소에서 API 키를 받아와야 합니다. app.js라는 파일을 생성하고, 아래와 같이 코드를 작성합니다.
const express = require('express');
const axios = require('axios');
const (MongoClient) = require('mongodb');
const app express();
const port = 3000;
const uri = 'mongodb://0.0.0.0:27017/';
const client = new MongoClient(uri);
app.get('/store-list', async (req, res) => {
try {
const response = await axios.post('http://data.krx.co.kr/comm/bldAttendant/get/sonData.cmd", null, {
headers: (
"User-Agent": "Mozilla/5.0",
"X-Requested-With": "XMLHttpRequest",
"Referer": "http://data.krx.co.kr/contents/MDC/MDI/mdiLoader/index.cmd?menuid=MDC0201020101",
"Content-Type": "application/x-www-form-urlencoded",
"apikey": "api키는 직접 받아서 삽입하시면 됩니다."
params: {
"bld": "dbms/MDC/STAT/standard/MDCSTAT01901",
"mktld": "ALL",
"trdDd": "20230425",
"share": "1",
"money": "1",
"csvxls_isNo": "false"
});
await client.connect();
const db = client.db('mydatabase');
const collection = db.collection('storeList');
const dataArray = Array.isArray(response.data)? response.data: [response.data];
await collection.insertMany(dataArray);
res.json({ message: 'Data saved to MongoDB'));
} catch (error) {
console.error(error);
res.status(500).json({ error: 'Internal Server Error'));
) finally (
await client.close();
});
app.listen(port, () => {
console.log("Server listening on port $(port)");
#3 app.js 파일 실행하여 MongoDB서버와 웹서버 연결
명령 프롬프트에서 다음 명령어로 app.js 파일을 실행하여 Express 애플리케이션을 시작합니다.
node app.js
서버가 잘 실행되면, 다음과 같은 메시지가 출력됩니다.

#4 MongoDB서버와 웹서버 연결 성공
app.js 파일에 작성된 코드 중 아래 코드는 연결 여부에 따라 해당하는 문구를 localhost:3000/store-list에 출력하는 코드입니다.
res.json({ message: 'Data saved to MongoDB' });} catch (error) {console.error(error); res.status(500).json({error: 'Internal Server Error' });} finally {await client.close();}});
서버 잘 실행됐다면 명령프롬프트에 "Server listening on port 3000" 이라는 문구가 출력됩니다. 문구가 확인됐다면 localhost:3000/store-list에 접속합니다. 성공적으로 연결이 됐다면 "message : Data saved to MongoDB" 라는 메시지가 출력됩니다.

#5 MongoDB에 저장된 데이터 MongoCompass에서 확인 서버 실행
MongoDB Compass를 통해 저장된 데이터를 시각적으로 확인할 수 있습니다. app.js 파일에 작성된 코드 중 아래 코드로 인해 이 코드로 응답 받은 데이터를 dataArray에 할당한 후 MongoDB 컬렉션에 여러 개의 문서로 삽입하게 됩니다.
const dataArray = Array.isArray(response.data) ? response.data : [response.data];
await collection.insertMany(dataArray);
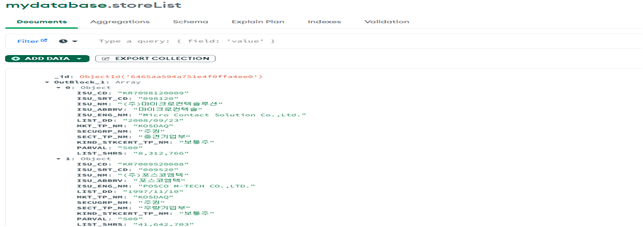
MongoDB서버와 웹서버가 잘 연결되고 데이터베이스에 저장됐다면 MongoDB Compass에서 mydatabase-stoerlist-Array 경로에서 시각적으로 저장된 데이터를 확인할 수 있습니다.
#6 쿼리코드 확인
마지막으로, MongoDB의 쿼리 코드를 통해 데이터를 검색해봅시다. 아래 코드를 MongoDB Shell에서 실행하여 특정 문서를 조회합니다. 그림에서 보이는 코드는 MongoDB의 MongoShell에서 실행할 수 있는 쿼리 코드로 "mydatabase"라는 데이터베이스에서 "storeList" 컬렉션을 조회하고 {"OutBlock_1.ISU_CD": "KR7098120009"}에 해당하는 문서를 찾는 코드입니다.
Studio3T에서 쿼리 결과를 확인하며 프로젝트를 마무리합니다.

이 프로젝트를 통해 한국거래소 API 연결, MongoDB에 데이터 저장, 데이터 시각화 방법을 실습했습니다. 질문이나 추가적인 도움이 필요하시면 언제든지 댓글로 남겨주세요! 😊
'Project' 카테고리의 다른 글
| [Hyperledger fabric] 2.1 Couchdb (로그인 오류 해결) (2) | 2024.10.18 |
|---|---|
| VMware Workstation Pro 무료 다운로드 및 설치 (8) | 2024.10.15 |
| [Hyperledger fabric] 3. Explorer 구축 (0) | 2024.10.09 |
| [Hyperledger fabric] 2. Couchdb 구축 (2) | 2024.10.09 |
| [Hyperledger fabric] 1. 구축 (2) | 2024.10.09 |